👤
1. Set up your profile
Add your name, phone, email, brokerage, photo, and logo. These details can appear on kiosk screens, follow-up emails, and signed records.
A practical setup guide for agents testing The Visitor Hub: profile, event setup, kiosk, QR sign-in, disclosures, visitor records, and follow-up.
Add your name, phone, email, brokerage, photo, and logo. These details can appear on kiosk screens, follow-up emails, and signed records.
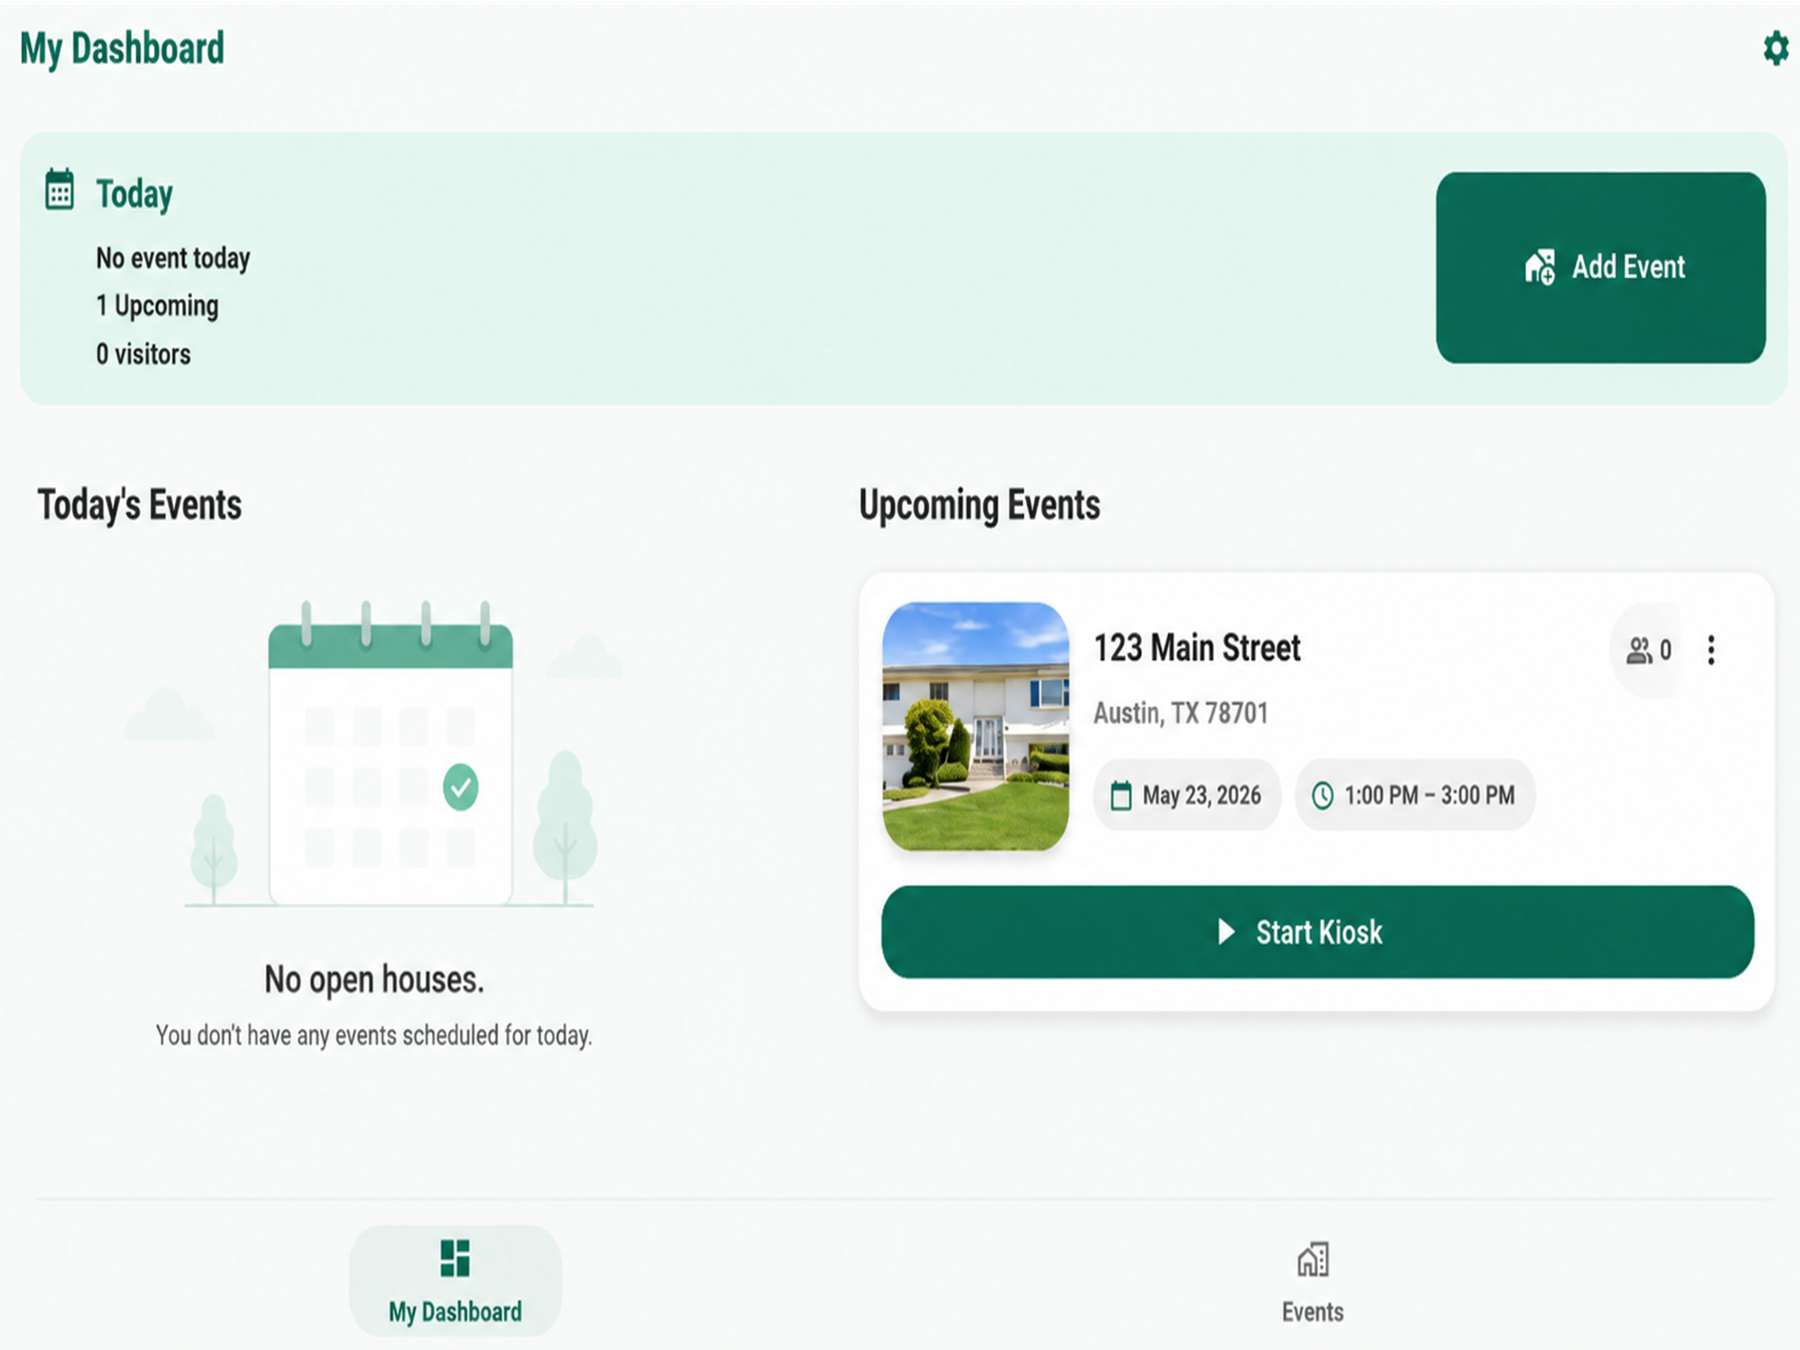
Add the property address, date, time, event type, questions, and disclosure settings. Use Open House or another visitor event type.
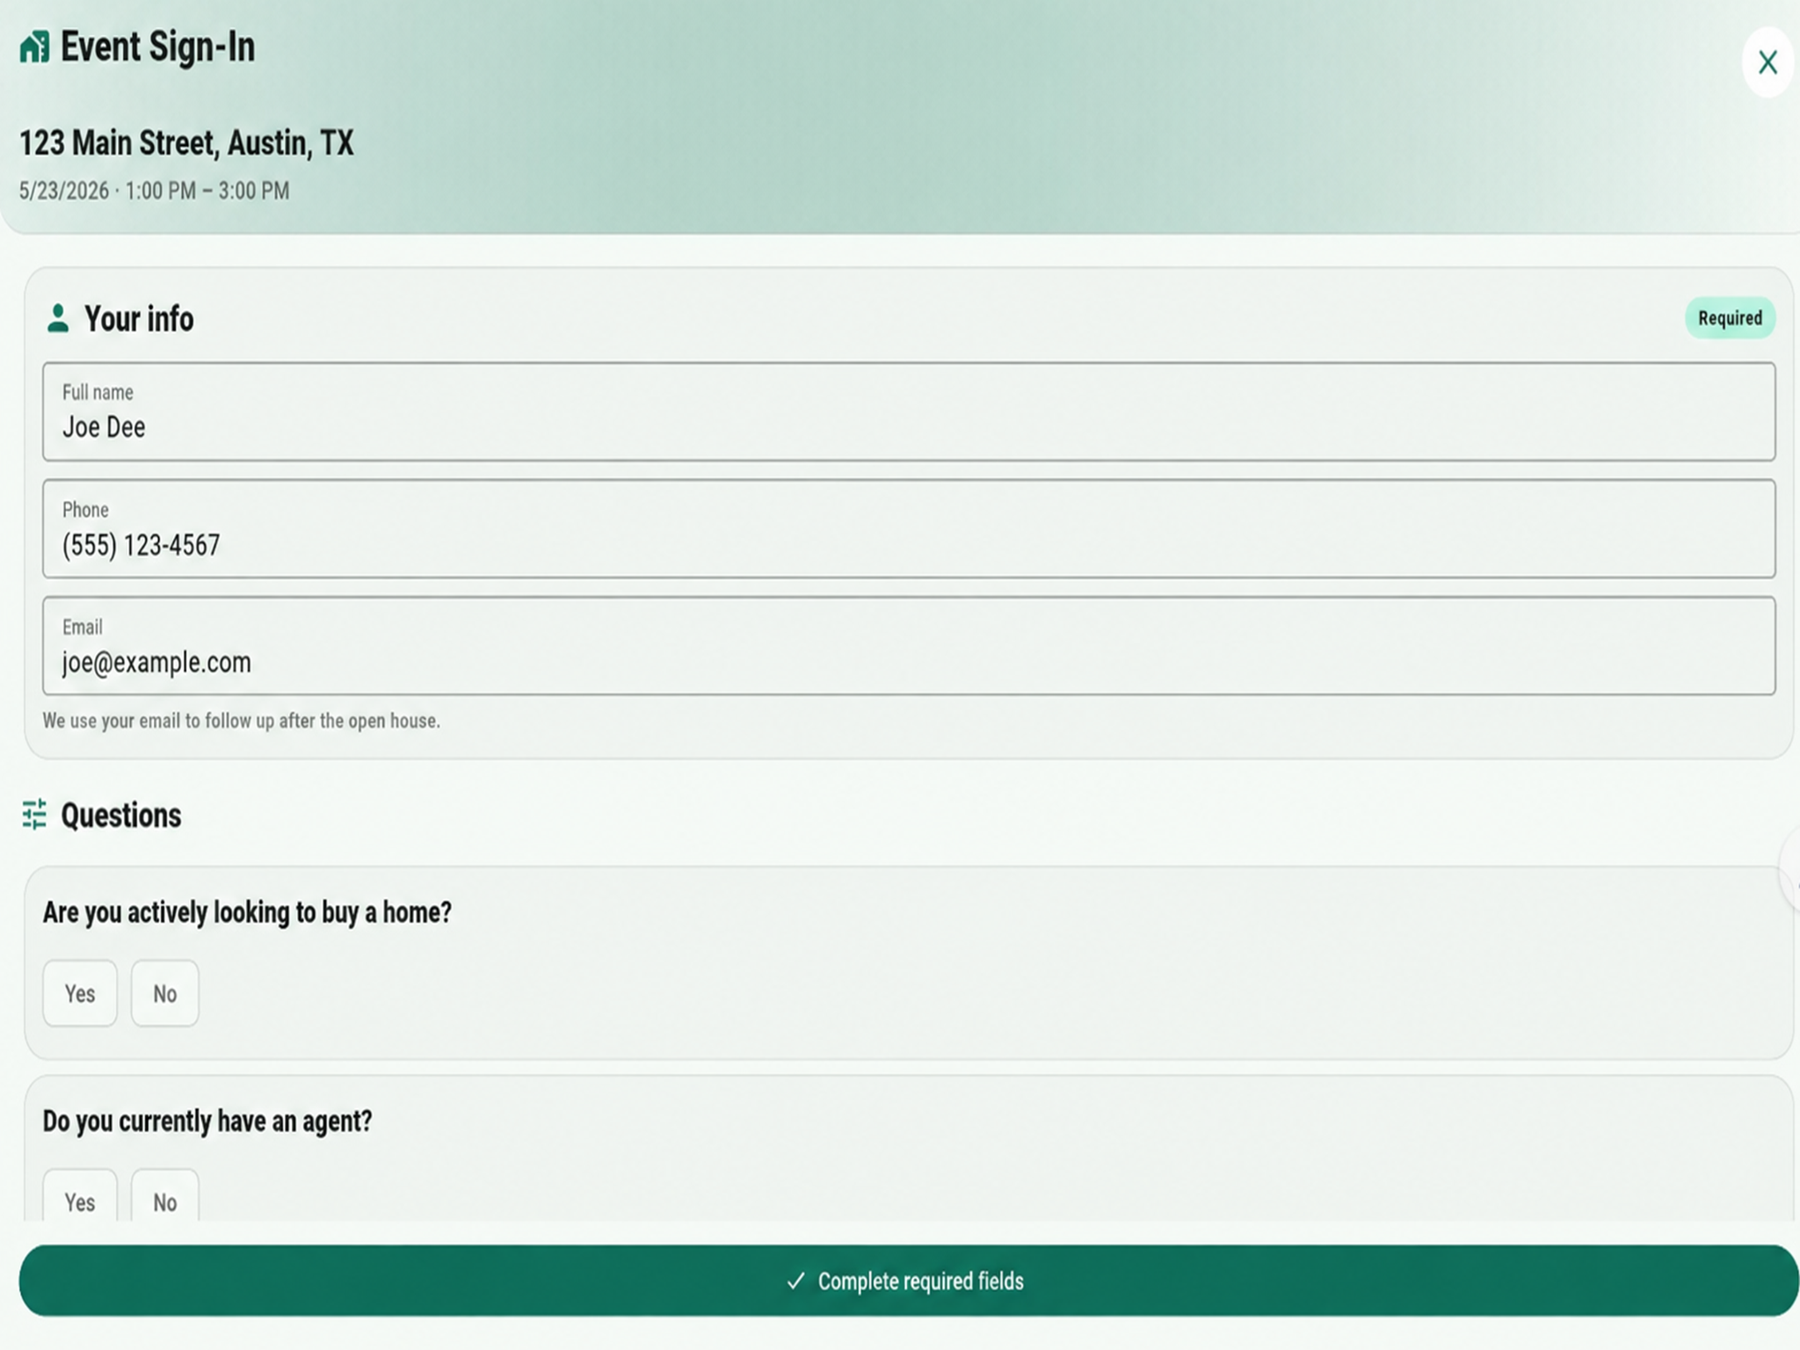
Start kiosk mode on a tablet or enable mobile self sign-in so visitors can scan a QR code with their phone.
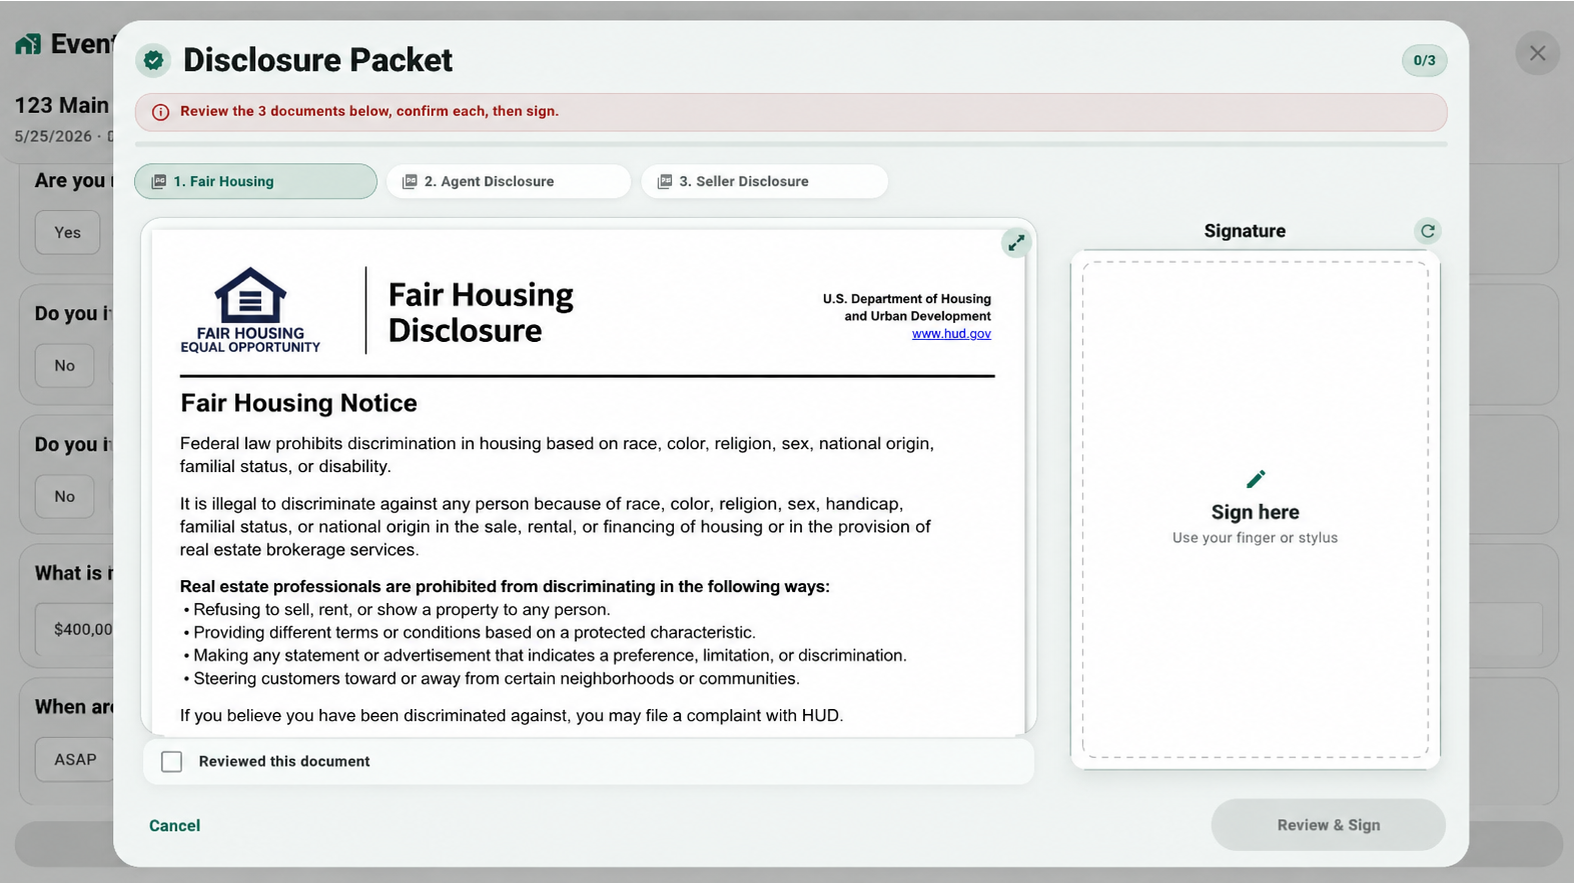
If disclosures are required, visitors review selected documents, confirm them, sign, and generate signed PDF records.
Open event details to view visitor answers, agent status, notes, signed disclosures, and export-ready records.
Use the event context to send cleaner thank-you messages and keep signed documents attached when enabled.
Use these screens to understand the full workflow before testing at a live event.
Keep the experience simple for visitors and reliable for your records.
Open the app before the event and confirm the event appears in Today or Upcoming.
Place the tablet near the entrance and show the QR option for visitors who prefer their phone.
After the event, review visitors, answers, PDFs, and notes from Event Details.
Download visitor data and send professional follow-up messages while the event is fresh.
Send feedback after each real event so the workflow can be improved before production launch.